|
|
|  DSH 391C' L% u G9 D3 T% v" A DSH 391C' L% u G9 D3 T% v" A
, B$ f) H% V, c s" d7 b) i. z' i$ \! i
| Ball pressure test
5 C0 Q e& R% \# N | 4, 7, 9, Figure 2/ E+ e9 [$ J h& `9 x8 ]( g
| 60695-10-2(ed.2)
* F: E x! |/ h( M& ]3 \ |
/ f( |" f0 a& l; X; U/ g& \( e& b( e+ S* ~. g- l
Question:
2 R4 s3 q$ T! H* | O- lDefine the “best practice” test procedure for the ball pressure test based on the requirements of the standard, and for practical reasons also based on 89/1011/CD, which is not in all respects identical with the requirements of the standard.) L4 U) ^: B; G$ e. v3 n8 N3 i6 z
Decision:
$ O: \* {$ L% K5 ?# r0 `In addition to clause 4.1 of the standard and due to various qualities of steel balls for rolling bearings, the tolerance for the steel ball diameter shall not exceed ±1% to ensure comparable results.
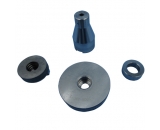
+ i6 u" J# S$ S0 o& Z+ z0 E8 pIn addition to clause 4.2 of the standard, the specimen support shall be a metal block of steel, with a diameter � 50 mm and a height of � 100 mm or equivalent volume and mass.
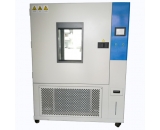
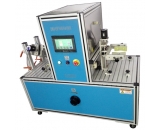
' ?! T+ c5 B* U6 D6 l! [In addition to 4.3 of the standard, a forced air convection single cabinet according to IEC 60216-4-1:1990, clauses 4.1.5 and 4.1.6 shall be used.8 S7 |) z9 ]; U! P9 l
In addition to 7.1 of the standard conduct the test in air, in a heating cabinet being capable to return within 5 min and without any temperature overshoot exceeding +5°C to the previously adjusted and required air temperature within a tolerance of +/- 2°C .$ a" a2 B) l7 `
Measure the air temperature as close as possible to the test specimen.
4 P4 J4 o8 q( I+ m5 R3 T% NBefore introducing the test specimen, bring the cabinet, the test apparatus and the test specimen support to the required temperature and maintain the required test temperature for 24 h or until equilibrium conditions are reached, whichever occurs sooner.
% s- ~ k( M6 i* M) l( KWhen thermal equilibrium conditions are reached, place the test specimen on the approximate centre of the test specimen support so that its upper surface is horizontal. Gently lower the pressure ball on to the approximate centre of the test specimen. Ensure that no conditions exist that will cause the pressure ball to move other than in a downward direction during the test.
$ [5 k" O& d& ~! BAfter the ball pressure apparatus has been applied for 60 +2/-0 minutes, remove it and within 10 s immerse the test specimen in ambient temperature water for 6 min ±2 min.$ Q, h0 U1 W/ Z ^5 {
Within 3 minutes of removal from the water, measure the diameter of the indentation caused by the pressure ball to one decimal place.' h- j; K' W8 R Y: }8 V) S. H
Deviant from 7.2 of the standard, but in accordance with 89/1011/CD, the diameter “d” of the indentation is to be measured as close as possible to the diameter of the “solid edge” of the indentation according to both a) figure 2a shown below and b) picture examples given in Annex A. The diameter of the solid edge of the indentation (dimension d ) shall exclude any material deformation as shown in figure 2c below.
9 p1 I a- ^8 K; ]The measuring instrument shall have an optical magnification between 10 x and 20 x and shall incorporate a calibrated reticule or cross-travel measuring table. A lighting device may be needed to provide appropriate illumination of the surface of the test specimen for measurement.
" X/ D$ w9 F. A7 qThe result is expressed as a pass if the diameter of the indentation does not exceed 2,0 mm.
6 |1 b3 w" C- t) Q5 Q" D: v7 V6 {6 XIn case of non-round indentation obtained, report the biggest diameter measurement observed. The maximum difference between the longest and shortest measurement should not exceed 0,2 mm.
. V! m3 J8 ^) d% F5 E- I# @In case of doubt, make two further tests on two other test specimen, both of which shall meet the pass criteria.
$ f' b0 e" ^+ W/ r$ Z; G5 O; c/ p
5 H4 v5 t$ f7 K( m8 s7 P. q
|
本帖子中包含更多资源
您需要 登录 才可以下载或查看,没有账号?注册安规
x
|


 窥视卡
窥视卡 雷达卡
雷达卡 发表于 2012-9-5 10:38

 提升卡
提升卡 置顶卡
置顶卡 沉默卡
沉默卡 喧嚣卡
喧嚣卡 变色卡
变色卡 抢沙发
抢沙发 千斤顶
千斤顶 显身卡
显身卡


